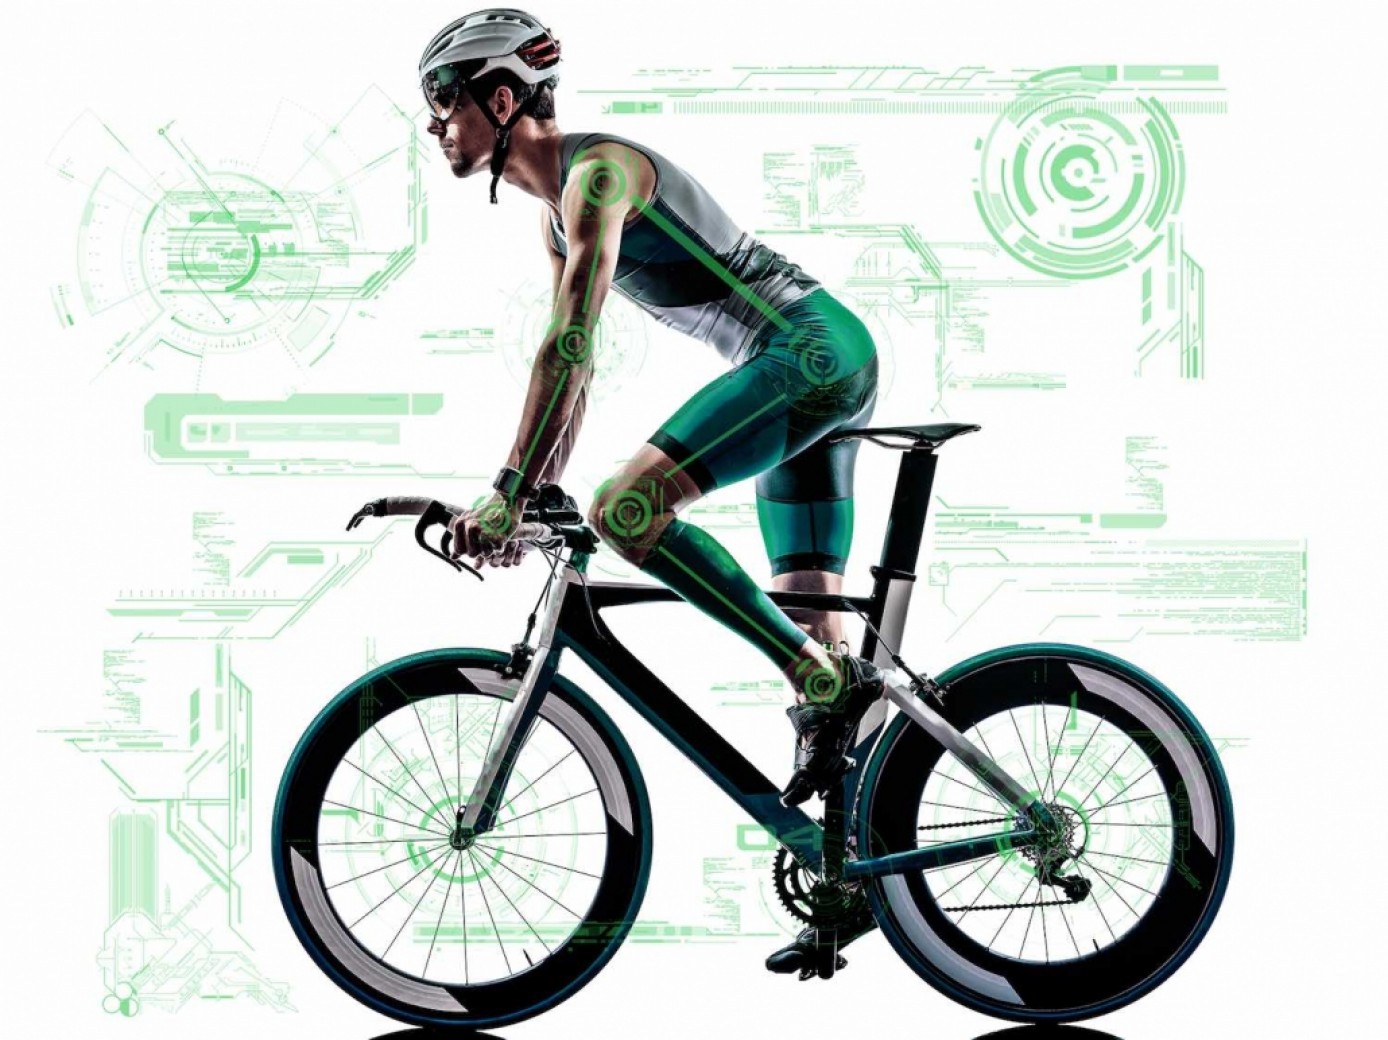
How to perform a biomechanical test at home
It never hurts to know how to adjust your bike so that it suits you perfectly, how to perform a biomechanical test in your own home, how to tune your machine so that it rides smoothly. It's not a perfect biomechanical study, but you can improve the fit. Let us tell you how.
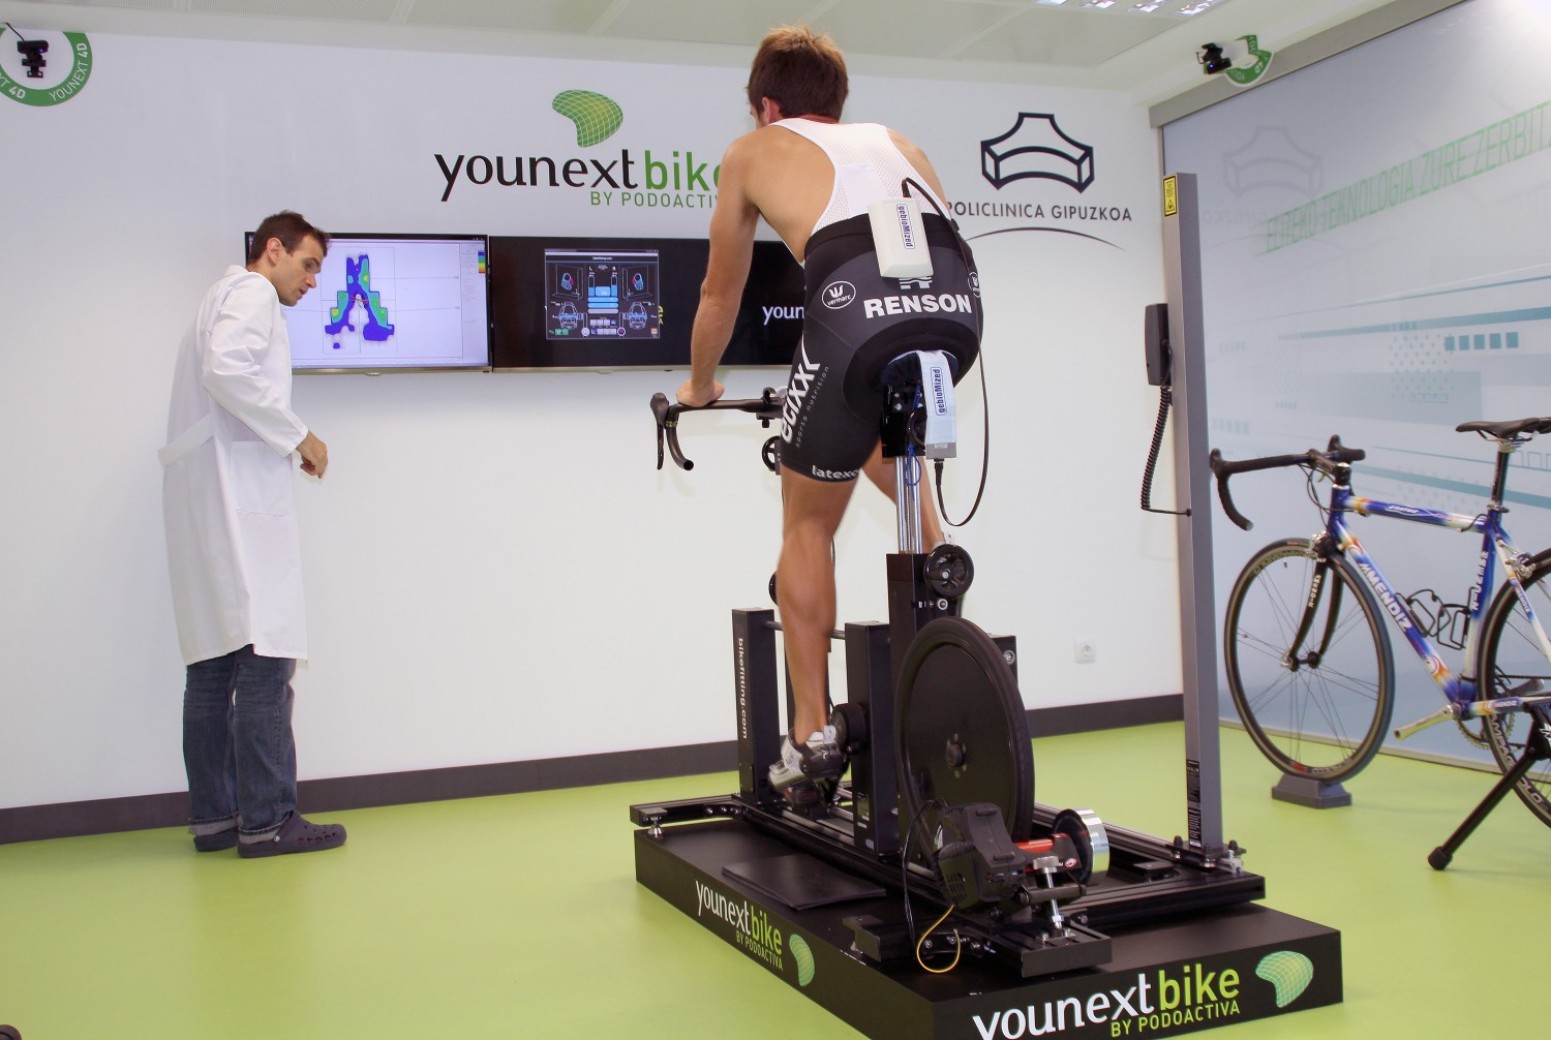
The price and availability of biomechanical tests
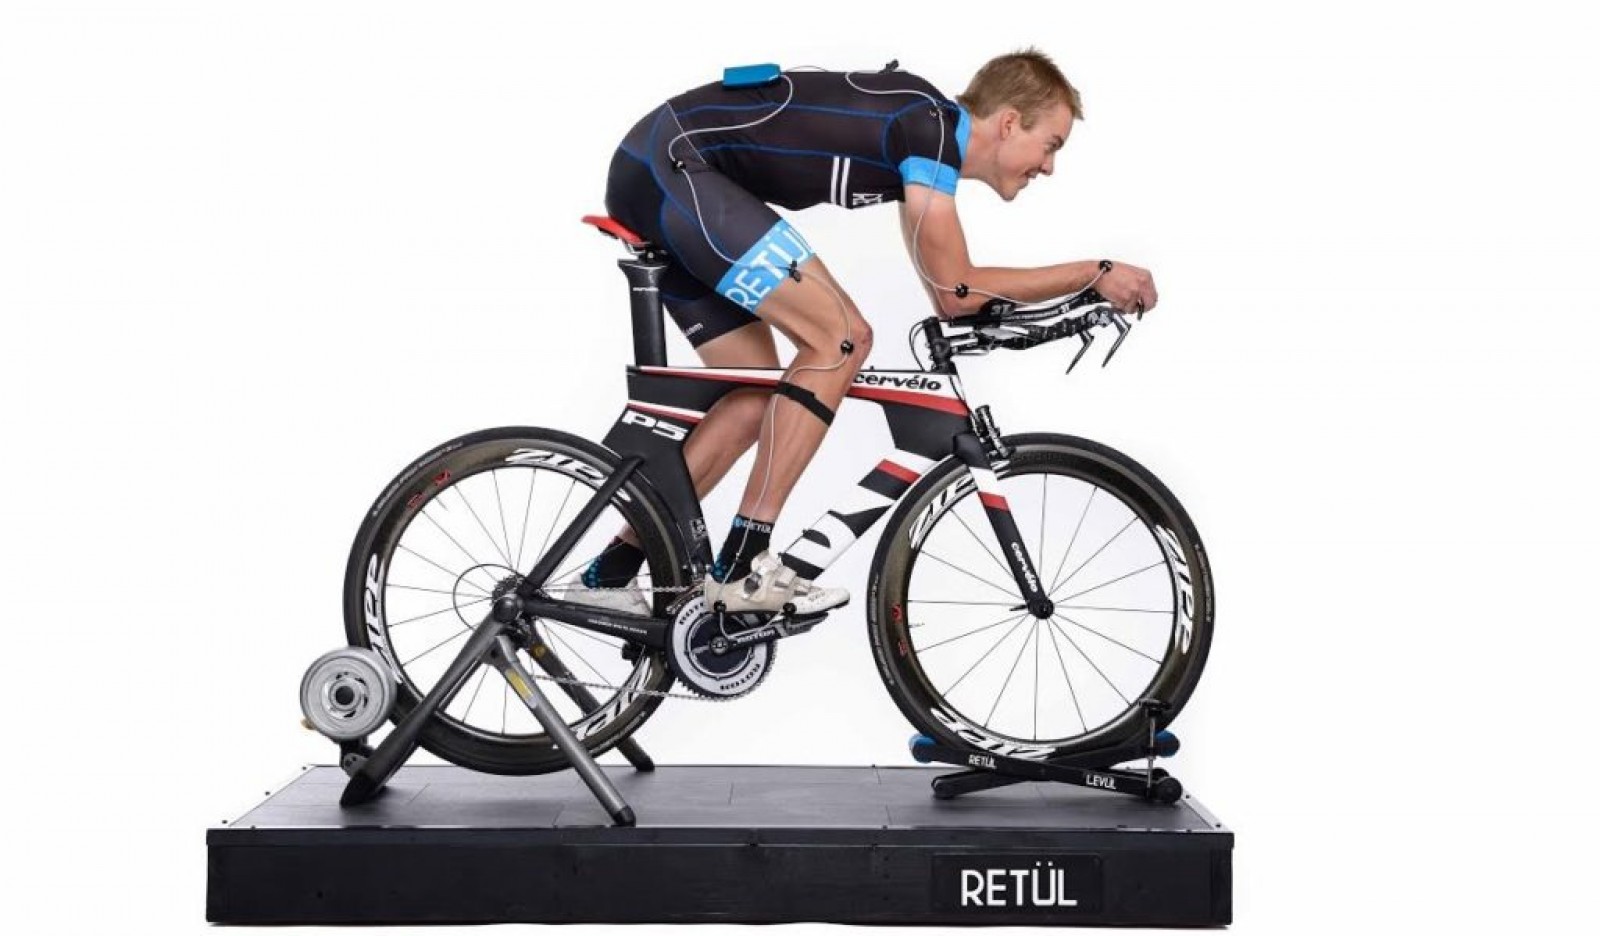
At the outset, a warning that perhaps we should not give but that we consider important to note: no one and nothing can replace a biomechanical test performed by professionals and specialists in a laboratory that is totally dedicated and perfected for this purpose. These notes are simply useful for adjusting your bike very well in your own home. Come on, it is not a substitute, only a complement.
RECOMENDADO

Top 7 XCO full mountain bikes of 2022
Harley Davidson releases its first eBike for sale
Puncture-proof SmartMousse for mountain bike, do you need it?

The SLF Motion carbon derailleur cages arrive at the single chainring drivetrains

Pistachios, the best recovery snack

Hans Becking signs for Buff Scott: "The Spark and bar ends don't seem like a good marriage to me, but we'll see"
There are circumstances in which a biomechanical study is not possible. Either because of the pandemic or because of the budget, because a biomechanical study is not exactly cheap. In these situations it is good to know the following.
In fact, its price can reach up to 150 euros in a professional studio or workshop, with equipment capable of a perfect fit. From there, there's a whole world of biomechanical studies, some slightly more expensive made by physiotherapists and others already crazy and accessible to a minority, which even include your analysis on your bike adjusted in a wind tunnel, to complete the polishing of the position.

So, nothing can replace all this, all this technology and knowledge in something like biomechanical tests that improve performance and prevent injuries. But it can replace it if you need it.

How to perform a Biomechanical test yourself at home
As not everyone can afford a biomechanical test or simply because of our use, we think we don't need it. These are our tips for adjusting your bike at home. From us and from many brands that sell online and have had to create a whole channel of communication and information to know how to adjust the bike that arrives to you disassembled.
First of all, adjust the cleat well. Place your shoe on your foot, lean it hard and mark its design with a pencil. Also, feel where approximately your metatarsals rest and join all these phalanges together with a line approximately. There and with that turn or degree of inclination should go the cleat. Once you do it, correct the turn by sitting with your feet hanging down and checking if that is indeed your natural position, your natural turn.

Secondly, the saddle. It must be flat, without dropping. It is ideal, but if it bothers you too much, you can lower it by half a degree or less. Its height is based on a simple formula: measure your crotch, the distance between the floor and the point where your two legs meet in the prostate area. Multiply that measurement by 0.088 and that is the distance between the bottom bracket and your saddle. If you see that it is not the exact one, consider small modifications depending on the thickness of your sole and cleat of your cycling shoes, or the padding of your saddle. Another way is to rest your heel on the pedal and, with your leg straight, adjust the saddle there. You will notice this especially because you have discomfort: if it is in the knee, kneecaps or close, it is usually due to a slightly low saddle; if it is in the back, it is usually because it is high. If the pain is in the hip, adjust its position forward and backward, to open more or less your hip in the pedaling. Finally, if your pain is in the back, maybe the cranks you use are not the right size.

Then, your position on the bike should be comfortable, relaxed, so the distance to the handlebars and the position of your trunk is important. This is usually measured by the opening angle of your armpit. This should be around 160°. You can position yourself, take a picture, and measure the angle in the image and then readjust.

Finally, the last significant adjustment is the position of your hands. They should be an extension of your arms, taking care that the angle is the same and the grip is good. It is easier to get close to the levers: you must be able to brake with your index finger only without losing grip on the handlebars.

With these tips, we hope to make your mini home biomechanical study easier. Remember that it does not replace a biomechanical test, but at least you will know that you are not committing an outrage in your adjustment, with the risks that this entails.
También puede interesarte
Mountain bike
Top 7 XCO full mountain bikes of 2022
Road
Harley Davidson releases its first eBike for sale
Mountain bike
Puncture-proof SmartMousse for mountain bike, do you need it?
Bike components
The SLF Motion carbon derailleur cages arrive at the single chainring drivetrains
Nutrition
Pistachios, the best recovery snack
Mountain bike